Toyota Yaris: Front Evaporator Temperature Sensor / Removal
REMOVAL
PROCEDURE
1. REMOVE BLOWER ASSEMBLY
Click here

2. REMOVE NO. 2 AIR DUCT
Click here

3. REMOVE COOLER PIPE GROMMET
Click here

4. REMOVE COOLER EXPANSION VALVE
Click here

5. REMOVE HEATER CLAMP
Click here

6. REMOVE HEATER RADIATOR UNIT SUB-ASSEMBLY
Click here

7. REMOVE NO. 1 COOLER EVAPORATOR SUB-ASSEMBLY
Click here

8. REMOVE NO. 1 COOLER THERMISTOR
| (a) Remove the No. 1 cooler thermistor. |
|

 Components
COMPONENTS ILLUSTRATION
*1 NO. 2 AIR DUCT *2 COOLER PIPE GROMMET *3 COOLER EXPANSION VALVE *4 HEATER CLAMP *5 HEATER RADIATOR UNIT SUB-ASSEMBLY *6 NO...
 Inspection
INSPECTION PROCEDURE 1. INSPECT NO. 1 COOLER THERMISTOR (a) Check the resistance. (1) Measure the resistance according to the value(s) in the table below...
Other information:
Toyota Yaris XP210 (2020-2025) Reapir and Service Manual: System Description
SYSTEM DESCRIPTION LOAD OPERATION OUTPUT (a) Load is turned on or off according to the operation signals and switch signals from each ECU. Components Semiconductor Power Integration ECU Power Distribution Box Assembly Operation Signal Communication Support *1: w/ Front Seat Heater *2: Built into power distribution box assembly Headlight ECU Assembly ○ - Not supported Fog Light Assembly ○ - Supported Rear Window Defogger / Mirror Heater - ○ Supported Taillight - ○ Supported Rear Fog Light - ○ Supported Back-up Light - ○ Not supported Outer Rear View Mirror Assembly - ○ Supported Panel Illumination - ○ Supported Seat Heater LH*1 High/Low - ○ Not supported Seat Heater RH*1 High/Low - ○ Not supported Passenger Seat Buckle Switch Delegated Input - ○ - Occupant Detection Sensor Delegated Input - ○ - Rear Seat RH Buckle Switch Delegated Input - ○ - Rear Seat CTR Buckle Switch Delegated Input - ○ - Rear Seat LH Buckle Switch Delegated Input - ○ - IGR Relay*2 - ○ Not supported SEMICONDUCTOR FUSE FUNCTION (a) When a malfunction current occurs during load operation, the current is shut off before the electrical lines emit smoke, and then load is turned off...
Toyota Yaris XP210 (2020-2025) Owner's Manual: Using Automatic Locking Mode (if equipped)
Follow these instructions when using a child-restraint system, unless you are attaching a LATCH-equipped child-restraint system to the rear LATCH lower anchors. Refer to “Using LATCH Lower Anchor”. Make sure the seatback is securely latched by pushing it back until it is fully locked...
Categories
- Manuals Home
- Toyota Yaris Owners Manual
- Toyota Yaris Service Manual
- Brake System Control Module "A" System Voltage System Voltage Low (C137BA2)
- Adjustment
- Immobilizer System
- New on site
- Most important about car
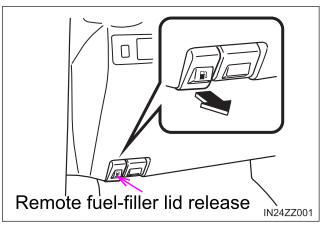
Refueling
Before refueling, close all the doors, windows, and the liftgate/trunk lid, and switch the ignition OFF.
To open the fuel-filler lid, pull the remote fuel-filler lid release.
Copyright © 2025 www.toyaris4.com