Toyota Yaris: Air Conditioning Unit / Disassembly
DISASSEMBLY
PROCEDURE
1. REMOVE LOWER DEFROSTER NOZZLE ASSEMBLY
| (a) Disengage the claws and guides to remove the lower defroster nozzle assembly. |
|

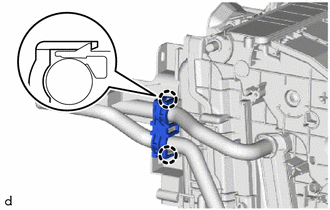
2. REMOVE COOLER PIPE GROMMET
| (a) Remove the cooler pipe grommet. |
|

3. REMOVE COOLER EXPANSION VALVE
| (a) Using a 4 mm hexagon socket wrench, remove the 2 hexagon bolts and cooler expansion valve. |
|

(b) Remove the 2 O-rings from the No. 1 cooler evaporator sub-assembly.
4. REMOVE ASPIRATOR
| (a) Disengage the claws and guide to remove the aspirator. |
|

5. REMOVE NO. 2 AIR DUCT
| (a) Remove the screw. |
|

(b) Disengage the claws to remove the No. 2 air duct.
6. REMOVE COVER
| (a) Disengage the claws to remove the cover. |
|

7. REMOVE DRAIN COOLER HOSE
| (a) Remove the drain cooler hose. |
|

8. REMOVE AIR CONDITIONING HARNESS ASSEMBLY
| (a) Disconnect the 3 connectors. |
|

(b) Disengage guides to remove the air conditioning harness assembly.
9. REMOVE AIR CONDITIONING AMPLIFIER ASSEMBLY
| (a) Remove the 2 screws. |
|

(b) Disengage the guide to remove the air conditioning amplifier assembly.
10. REMOVE BLOWER ASSEMBLY
Click here

11. REMOVE NO. 1 AIR CONDITIONING RADIATOR DAMPER SERVO SUB-ASSEMBLY
| (a) Remove the 3 screws and No. 1 air conditioning radiator damper servo sub-assembly. |
|

12. REMOVE HEATER COVER
| (a) Remove the screw and heater cover. |
|

13. REMOVE HEATER CLAMP
| (a) Disengage the claws to remove the heater clamp. |
|
14. REMOVE HEATER RADIATOR UNIT SUB-ASSEMBLY
| (a) Remove the heater radiator unit sub-assembly as shown in the illustration. |
|

15. REMOVE NO. 1 COOLER EVAPORATOR SUB-ASSEMBLY
| (a) Disengage the clamp and guides. |
|

| (b) Remove the 2 screws. |
|

(c) Disengage the claws and guides to remove the upper heater case with No. 1 cooler evaporator sub-assembly.
| (d) Remove the No. 1 cooler evaporator sub-assembly with No. 1 cooler thermistor from the upper heater case. |
|

16. REMOVE NO. 1 COOLER THERMISTOR
Click here

17. REMOVE AIR DUCT ASSEMBLY
| (a) Remove the 3 retainers. |
|

(b) Separate the front panel silencer as shown in the illustration.
| (c) Remove the 2 nuts and air duct assembly. |
|

 Removal
REMOVAL CAUTION / NOTICE / HINT The necessary procedures (adjustment, calibration, initialization, or registration) that must be performed after parts are removed, installed, or replaced during the air conditioner unit assembly removal/installation are shown below...
 Reassembly
REASSEMBLY PROCEDURE 1. INSTALL AIR DUCT ASSEMBLY (a) Install the air duct assembly with the 2 nuts.
(b) Install the front panel silencer as shown in the illustration...
Other information:
Toyota Yaris XP210 (2020-2025) Reapir and Service Manual: Deterioration of Battery Low Capacity (P160200)
DESCRIPTION The auxiliary battery condition is calculated from the voltage when the engine is running (except when cranking) and then output to the ECM. A DTC is output when auxiliary battery degradation is determined based on this signal. DTC No. Detection Item DTC Detection Condition Trouble Area MIL Note P160200 Deterioration of Battery Low Capacity While engine is running (except when cranking), auxiliary battery capacity is abnormally low for 10 seconds or more...
Toyota Yaris XP210 (2020-2025) Reapir and Service Manual: Installation
INSTALLATION CAUTION / NOTICE / HINT HINT: Use the same procedure for the RH side and LH side. The following procedure is for the LH side. PROCEDURE 1. INSTALL FRONT AIRBAG SENSOR (a) Check that the ignition switch is off. (b) Check that the cable is disconnected from the negative (-) auxiliary battery terminal...
Categories
- Manuals Home
- Toyota Yaris Owners Manual
- Toyota Yaris Service Manual
- Adjustment
- Engine Start Function When Key Battery is Dead
- Opening and Closing the Liftgate/Trunk Lid
- New on site
- Most important about car
Turning the Engine Off
Stop the vehicle completely. Manual transaxle: Shift into neutral and set the parking brake.Automatic transaxle: Shift the selector lever to the P position and set the parking brake.
Press the push button start to turn off the engine. The ignition position is off.